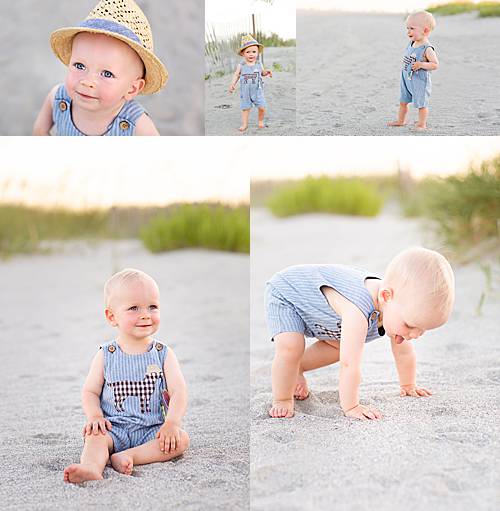
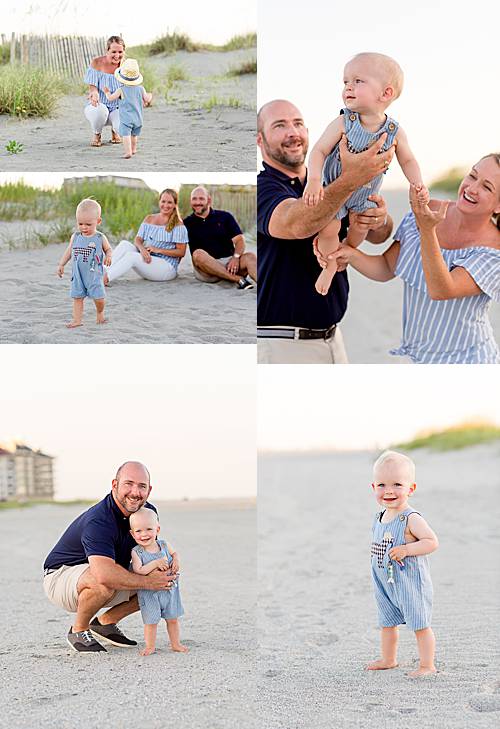
So you get home from your trip to the beach and look through the hundreds of photos you snapped just to realize…they all look pretty much the same. Yeah, there are ones you like best and ones you like least, but over and over again you see the same background, same people, same setup. You could frame a couple of them, but you’d never frame several together because they’d all look the same. This is especially common when the location views don’t change much a beach, an open field, etc. So let’s talk today about how to make your photos more interesting. It’s quick fix.
5 ways to make your photos more interesting
1-Change Up The Angle
Just shifting your feet several inches to the side or squatting down lower can give you a dramatically different look. It changes what you get in the frame: different sides of the face, different things in the background, a different perspective. If your subject is standing still, you can still move your feet and switch it up over and over again. Try standing on a stool and shooting down. Try getting low and shooting up. Try a shot from the side. Try it all….you can always toss the ones you don’t love.
2-Vary the Distance
This one is so important and often overlooked. Use your feet (or your zoom lens) to vary the close ups with wide shots. If I’m photographing a child, I’ll get a shot at a “normal” distance, then I’ll get really close and grab those little details…a close up of his face, just his eyes, tiny hands, etc.. Then I’ll back up and make sure to get a wide open shot to show where we are…the beach, his bedroom, the park. Without him ever moving, I can quickly get 3-5 shots that look completely different.

3-Keep an eye on the background
Even if you’re shooting in a place where the background looks mostly the same (ie. the beach), you’ll find that it appears different depending on the angle. At the beach, I can shoot back toward the dunes or I could shoot toward the water. I could even shoot long down the beach to see the sand stretching on for what seems like miles. If I stand up and shoot down, I’ll get a background made up totally of sand, all white or light brown. I may choose to get the buildings in the background to show context or purposefully leave them out. There are so many options, even when it doesn’t seem like it…just keep an eye on that background.
4-Try different facial expressions
While the first 3 tips are things you can do on your own, these next two will involve your subject. Remember to think about the facial expressions. Think about it….a smile vs a serious face can completely change up the look and feel of an image. When working with kids, they tend to give us a whole range of facial expressions without even asking, but adults can use some prompting. You might ask for a “soft smile” or a “little laugh” or maybe tell a joke and get a big genuine chuckle. While they’re switching up their facial expressions, you can still be switching up your angles and moving your feet to vary the distance between you and them. In a matter of minutes, with practice, you can get a whole handful of images that look totally different.
5-Mix up groupings
Lastly, think about mixing up groupings. Whenever I work with more than one person, I make sure to start with the entire group and then break it down from there, even grabbing individual shots of each person. So if you’re photographing your 3 kids, start with all 3 of them, then do “just the sisters” or “just the brothers”, then move onto individuals of each of them.

Keep these 5 things in mind next time you get out your camera to take pictures of your family or your little ones. It can be so easy to snap one photo and call it a day, but there are so many possibilities with minimal effort. You can create a wall gallery with lots of variety quickly and easily, even if you’re only photographing one person in one place.
Want even more easy-to-use photography tips?
Join me in a FREE photography workshop:
5 Keys to Taking Better Pictures
Until Next Time,

comments +